The pages and text below are from the VC-9 report on the action of October 4, 1943. Some of the photos on the sheets below are also found in the photographic collection of the US National Archives at College Park, Maryland. These photographs can be viewed by clicking on the hypertext in the list following each page. |
PAGE ONE Photographs |
|
Upper left |
missing |
Lower Left |
missing |
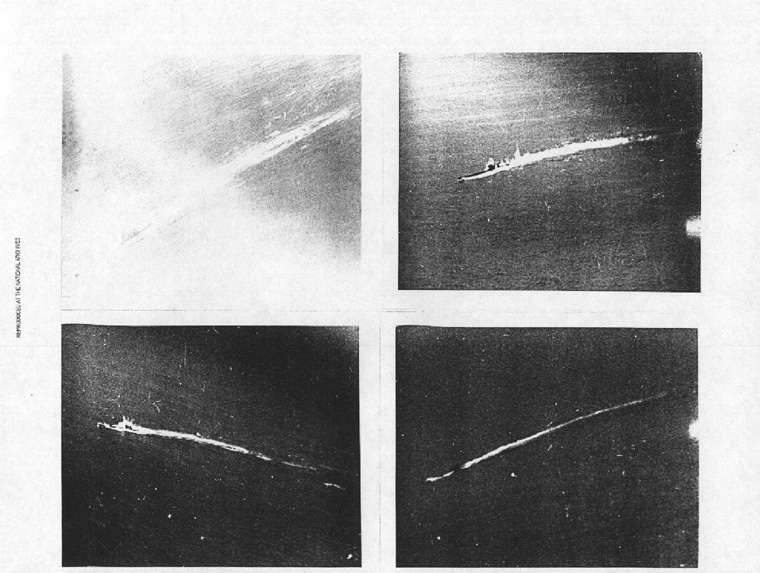
| PAGE ONE: All of these pictures were taken about one-half hour after Lieut. (jg) Stearns dropped his 500 pound bomb. Lieut. (jg) Weigle had arrived, but the F4F's were not yet on the scene. Only three U/Bs are visible in the first picture, but all four U/Bs can be seen in the other three pictures. One of these (bottom left of picture) is turning in a very tight circle to starboard, and another is preparing to dive. It will be seen turning hard to starboard, and crossing the bows of the two in the background, and steaming on an opposite course, between these and the one turning in the circle. It then continued on a straight course away from the others, and submerged just before the arrival of Lieutenants (junior grade) Puckett and Heim in F4F's. | ||
PAGE TWO Photographs |
|
| PAGE TWO: The U/B which has been circling hard to starboard can be seen pulling out of this maneuver and joining up on the other two U/B's. After the first one dove (bottom left of first picture) while these three pictures were being taken the two fighter pilots were conducting three strafing attacks on the U/B seen in the center of the bottom two pictures. These two photographs also show how close together the submarines maneuvered while they were trying to fight off the attacking planes. | ||
| Attention is invited to the submarine in the bottom two pictures, which has circled to starboard, an extremely short distance ahead of the U/B in the background. It also appears to be making more speed than the other two. This is the U/B which was under fire from the two fighters. Its tactics are exactly the same as the first U/B to dive. After circling hard to starboard, it straightened out and proceeded to submerge, while on an opposite course from the other two. | ||
| The submarine in the foreground is the Fueler. It also appears to be preparing to dive, but it stayed up long enough after this to receive three strafing and one depth charge attack. | ||
PAGE THREE Photographs |
|
Lower right |
missing |
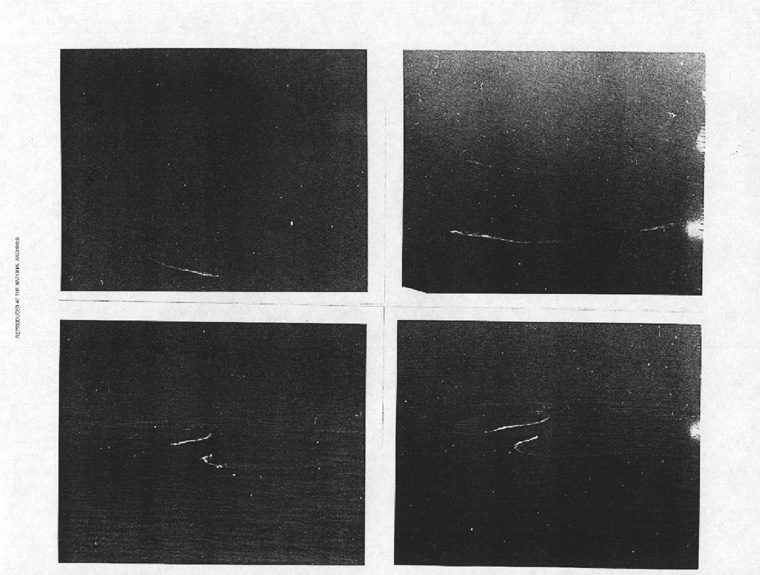
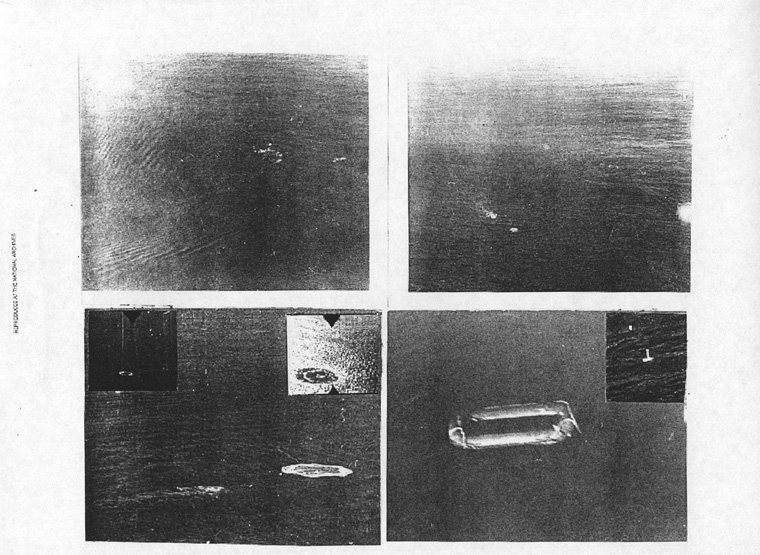
| PAGE THREE: The wake left by the second submarine to dive is still visible (bottom left of picture). The Fueler, (the one in the foreground of the last picture) having gone on a straight course converging with the last remaining U/B, makes a very tight turn to port, to join up again on the other U/B (which is picking up speed) after it has crossed the Fueler's bow in a turn to starboard. (Top two pictures). | ||
| The inset on the right shows the steep angle of dive the Fueler made just after the depth charge attack. | ||
| The larger picture at the bottom right is of the slick made by the exploding depth charges. On beyond is what remains of the swirl where the Fueler dove, and in the background, can be seen the wake of the last remaining U/B, as it turns hard to starboard. | ||
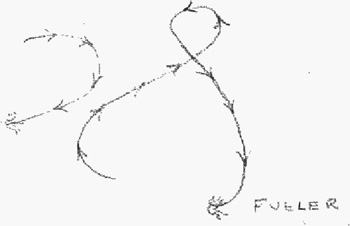
| The diagram below is a rough sketch of the courses of the last three U/B's, as they covered each others dive. | ||
 |
||
| PAGE FOUR: The next page contains close-up views of the last two U/B's to dive. Those on the right are of the Fueler. | ||
PAGE FOUR Photographs |
|
PAGE FIVE Photographs |
|
Upper right |
missing |
| insert photo only | |
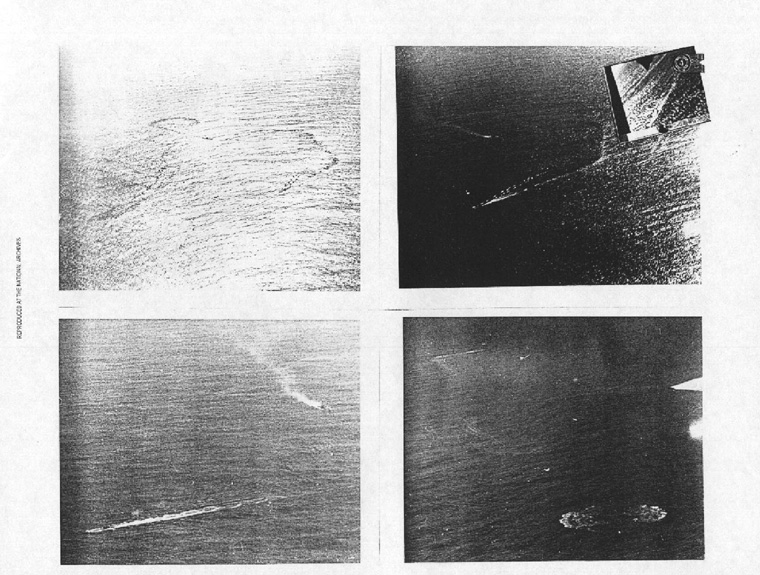
| PAGE FIVE: These are the pictures of the mine attack by Lt. (jg) R. L. Stearns. | ||
| The picture on the top left shows how the U/B turned violently to port just as it submerged. The tip of its stern is still visible above the surface, and the bullets from Lt.(jg) Puckett's last strafing attack can be seen splashing in the water. To the starboard of the swirl is a small disturbed patch of water where the mine was dropped. | ||
| The picture on the top right and the inset show the first signs of the exploding mine, directly ahead of the swirl. | ||
| The picture and insets at the bottom left are other views of the boil caused by the explosion. | ||
| On the bottom right is a picture of the life raft which was being towed behind the Fueler at the time of sighting. The towing hawser can be seen at one end. | ||
| The inset at the bottom right is of an unidentified object which appeared shortly after the explosion. Those who saw it said it looked like a periscope but did not have any apparent forward motion. This is not one of the "cylindrical objects" mentioned in the ASW-6 report. They were larger in diameter than this, and, unfortunately, no pictures of them were obtained. | ||
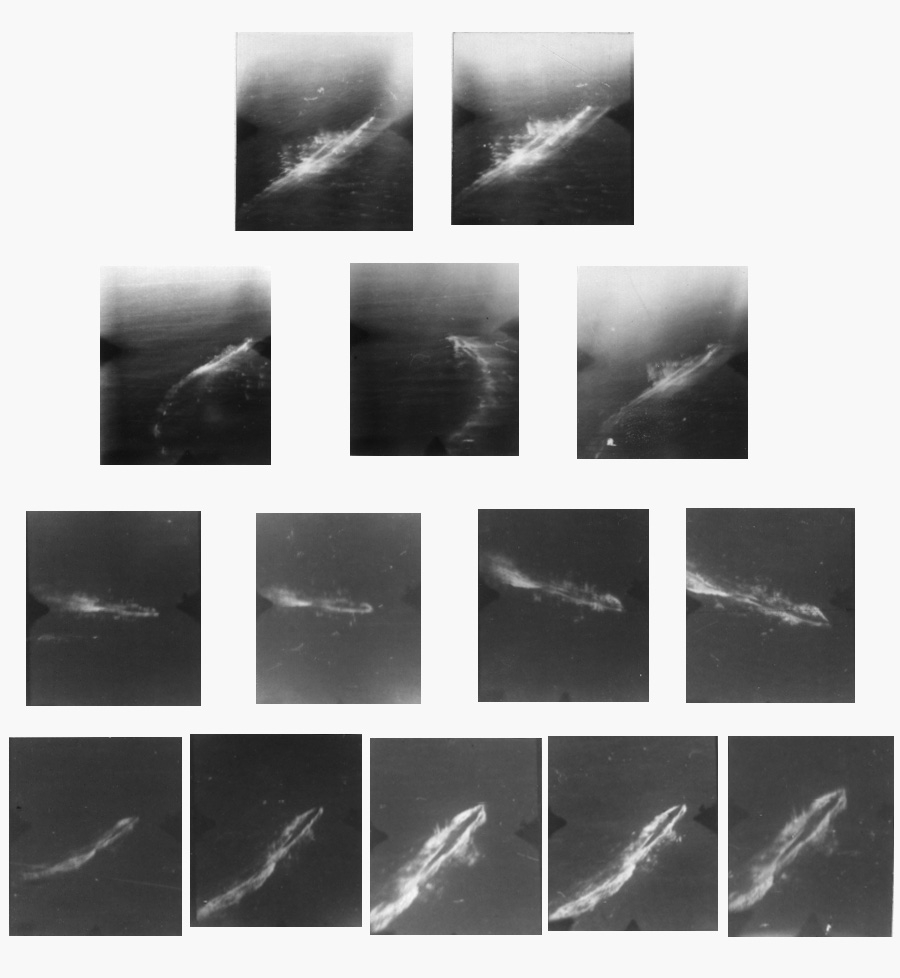
| The pictures on the following page were taken by the two fighter pilots on their strafing attacks. The top two rows are of Lt.(jg) S. B. Heim's attacks and the bottom two rows are of Lt.(jg) D. O. Puckett's attack. | ||
| Respectfully Submitted, | ||
| |
||
| LESLEY McCREATH, Jr., | ||
| A.C.I. Officer, | ||
| VC-9. | ||